You might think that your ancestors were always home when the census taker knocked on the door. Or that they all sat down, had a cup of coffee or tea while they cooperated completely with the census taker’s questions. Honestly, we have no idea what happened. With the exception of the 1940 census, we have no idea who gave the information to the census taker. We don’t know if it was the head of household, his wife, one of the children, a neighbor, or if the census taker made it all up. We just don’t know.
This not knowing creates a lot of problems for genealogists who are trying to establish proof using the principles of the genealogical proof standard. Having an unknown informant on a record does not allow for the researcher to determine how much firsthand information that informant was likely to have. Therefore we have to assume that the information given to the census taker is suspect, likely to have errors. This should not stop us from using the census. On the contrary! The census is one of the records sets I use most often to establish ancestors in a time and place.
Having an unknown informant is one of those hurdles of the census. Use the data you find in the census as a road map to other documents, as the skeleton upon which other research is built. Corroborate everything you find in the census with other documents, with known informants. Only then will you be able to know you have the correct information.
Unfortunately there is no genealogical time machine that allows us to go back to the day the census taker visited our ancestors. (I’m still working on that technology in my lab. I’ll keep you posted.)
We’ve all seen it. You’re looking at the index on a commercial website and you just can’t find that name you are looking for. But there are a few that are close in other regards. Maybe the first name is correct but the last name is not even close. Maybe the last name is completely butchered but the names of everyone in the household match up to what you are expecting. And then you click to see the actual census image and there they are, the last name as plain as day to you. Why then, was it indexed so poorly?
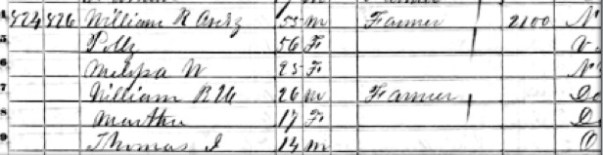
For example, unable to find William Avery, I stumbled upon this index entry:
It very clearly says “Avery” to me, but then again, I KNOW the name I’m looking for. Thankfully Anestry.com allows you to “add alternate information” that shows up when searching. Through collaboration, some of those incorrect index entries can be corrected.
Indexers aren’t always from the same geographic area as the records they are indexing. They may not even be from the same country. We’ve all heard that sometimes these indexing projects are farmed out of the country for cheaper labor. I don’t know for sure, I haven’t looked into it myself, but I know that even indexing records from a different part of the United States can be a challenge! (I’ve done it through FamilySearch Indexing and am much more comfortable indexing Ohio records than I am Georgia records.)
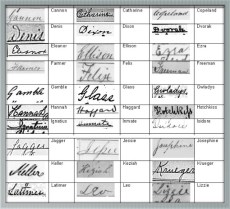
A sample of a section in Ancestry.com’s wiki on how to read old handwriting.
Aside from lacking familiarity with an areas surnames, there’s the problem of bad handwriting, old script-style handwriting, archaic letter formations, and the like. Good indexers have to try to understand old, swirly, twirly script, they have to become detectives and handwriting analysis experts. Most of the time, they simply do the best they can. There is the human factor to indexing. No one is perfect. Even the best make mistakes.
I am an active indexer for FamilySearch Indexing as well as working on indexing projects for my local area, and have come to have a completely new understanding for what it takes to be an indexer. It has allowed me to have some compassion for those who have so kindly and graciously indexed records for my benefit. I understand why ‘f’ and ‘s’, ‘z’ and ‘g’ or ‘a’ and ‘o’ get confused sometimes. Let’s not forget to be grateful for the speed with which records get indexed these days and the wide accessibility of them. (Almost gone are the days of reeling microfilm page by page by page.)
When you see those errors, think about me (and the thousands of volunteers like me), indexing your ancestors’ records to the best of my ability.
Like the problem of language barriers, literacy (or the lack thereof) likely complicated the census taker’s job. Most of my ancestors, as far as I can tell, had a limited education. Only in the 1900s do I begin to find out that my ancestors went to school. Those that I was able to talk to only went through some elementary or middle school. Their focus was on earning a living, and especially through the Depression era, helping their parents make ends meet. School and education were not a focus in my family until recent times. I have one grandfather who attended Bowling Green State University, but it is unclear if he graduated (WWII happened and he enlisted). Other than that, it’s been my parents’ generation that really began to focus on education.
Andrew Slye is enumerated as “Schlei”
Keep this in mind when trying to locate your ancestors in the census. While YOU may know how your ancestors spelled their names, sometimes they did not. Take Andrew Slye (father of Leonard Slye, aka Roy Rogers). He is enumerated in the 1920 census as ‘Schlei.’ We can only imagine why. I don’t believe the Slyes had accents since they had been in the country for many generations. Maybe a neighbor gave the information because they weren’t home. Maybe the census taker was foreign-born. Maybe the census taker hadn’t done that well with spelling in school or never went to school. Who knows. The point is, literacy could and did affect the way millions of ancestors were enumerated.
Literacy can be complicated by the previous post, language barriers. Imagine if the census taker had a limited education AND had to try to understand a thick accent! Double trouble.
I have deep Germanic roots. My grandfather told stories of how his grandparents sat around the table and spoke in German. They were not the immigrants, in fact, I’ve traced back several generations beyond theirs and still haven’t found the immigrant ancestors! This tells me that they were proud of their heritage and carried their culture with them through many generations. Our country is made up of countless cultures all blending together and collectively adopting English as the primary language.
Imagine the census taker. He rode around on a horse or in a buggy or walked. He would have had to deal with the elements, hot sun, soaking rain or blustery wind. He knocks on the door of a farmhouse and is greeted by the farmer’s wife… and a thick accent. If they were not native English speakers, their ability to communicate and answer the census taker’s questions were likely limited.
l have encountered many times what I can only imagine is a problem with understanding thick accents. I have worked on the Limmer family for a long time. They have proven quite challenging to find in the census however. I would never have guessed the differing ways to spell “Limmer” but have had quite a time learning all about it:
Leemer
Leeman
Limer
Lammer
Lamer
Laman
Lamman
Limar
Limmar
And so on… Pondering this difference in spelling, I began to understand the plight of the census taker. First he had to try to understand what they were saying, then he had to try to spell it. And if he asked “How do you spell that?” he would have had to try to understand what letter they were saying. Pronouncement of letters varies from language to language, which I learned from taking Spanish in high school and German in college. (What letter was that?) I can only imagine.
This understanding was highlighted for me here in the 21st century. I went to lunch with my mentor Birdie Holsclaw. The lady at the counter asked for her name so they could call it out when her sandwich was ready. When we sat down, I caught a glimpse of her receipt: “Bertie.” She just typed what she heard. No accents involved! Now, imagine a German sandwich maker…
One of my favorite record sets for creating a framework for any given family is the census. Census records can be an invaluable wealth of information putting ancestors in a time and a place every ten years (every five if you are lucky enough to have them in a state that held a state census every five). In the censuses from 1790-1840, only the names of the heads of households were recorded (and using those censuses can be a whole different animal). However, in 1850 we begin to get more information with every census. Heads of household, relationship to that head, birthplaces, birth month and year, occupations, whether naturalized, military service, and so on.
When I begin researching a new family line, I invariably begin with the census. Finding their names in the correct time and place gives the researcher a solid foundation to begin from. The census is like the solid footing from which all other steps are based: find the family in the census, mark them on a map and begin searching for other records in the town, county, state and trace migrations when they occur.
There are many reasons why you may be having difficulty finding your ancestors in the census. This series of blog posts will share some of my favorite “hurdles” for finding those ancestors. I will cover things such as language barriers, literacy issues, indexing errors, information quality, microfilming errors, and I will end with some of my favorite searching tips and tricks.
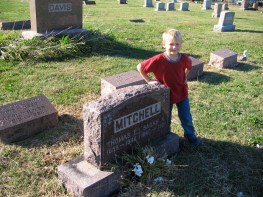
My son Ethan helped to find an elusive tombstone. Photo by Cari A. Taplin
I am a mom with two children still at home. When I began this genealogy journey my son was just 5 months old. He’s almost 13 now and my daughter is 10. Sometimes it’s a challenge to get them to be involved and not grumpy when the car takes a side trip to visit a cemetery or library. When I take a research trip to Wood County, Ohio I am usually there to visit my family and often our trips are too short. I like to combine the research with the visiting to maximize the time we have together: “Hey grandma, let’s go to the cemetery and you can tell me about your great-grandparents and their families.” Taking your family along on research expeditions can be a fun way to get them talking about your ancestors and getting them more interested in what you are doing.
I’m not above bribery. When I take my children to a cemetery I offer them a small fee (25¢ for even looking) and a prize for who finds the tombstone (50¢). It motivates them and makes it easier for me to have little energetic legs tromping around the cemetery. My son is especially good at finding the tombstones. I don’t know how many times I’ve taken him to the cemetery, given him the name we are looking for and he’s off in a flash, zig-zag across the cemetery. In no time at all I hear “found it!” sometimes even before I’ve had a chance to get started! (By the way, he is for hire.)
With the older family members it is sometimes just nice to get them out of the house and to a place they probably haven’t been in a long time. My grandma especially likes to drive around out in the country reminiscing about times gone by, who lived on which farm, who she went to school with, and the fun (and not so fun) times she had. My dad seems to like the thrill of the chase, like finding items on a scavenger hunt. If you have reluctant relatives, you might offer to buy them lunch if they come along.
Combine your research trips with visiting with relatives. Take notes (well, not if you are the one driving) or record conversations on your phone or with a digital recorder. Or have an able person in the car take notes while you’re driving. At any rate, conversation will tend to revolve around what you are looking for. Memories will be triggered when you are looking for Great-Aunt Martha’s grave. You’ll want to be sure to get those memories down on paper.
Involving your family members in your research jaunts can be very rewarding and fun. It might give you the opportunity to connect with some relatives you don’t get to see very often. Whatever you do have fun and enjoy the journey!
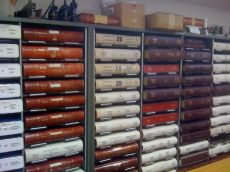
Inside the Hancock County Courthouse research room. Photo by Cari A. Taplin
Before you embark on any research trip, it is wise to give yourself the time to comb through the repositories’ online catalogs and finding aids. Almost every library, archive and courthouse is going to have some kind of information online to help you plan your trip. My favorite thing to do (and the task which I usually short change myself on) is looking at online catalogs and creating a list of what I want to look at when I get there.
Salt Lake City’s Family History Library is a great example of an online catalog that is informative, easy to access and simple to plan from. If you have thought out your research goals and have a plan, then accessing the catalog and creating a “to do” list is the final step (well, before packing and filling up the car). It is like drawing a map for your visit in the library. We only have so much time before we have to leave any research trip so getting the most out of your time is essential.
There are several ways to collect the data and create the list of records, books, or micro-materials you want to access. Back in the “old days,” and by “old days” I mean before smart phones, tablets and even the wide-spread use of laptops, I used to access the catalog, print the page containing the description of the item, write on the blank space of the page or on the back who or what I was hoping to find in the record, and then would store it in a 3-ring binder. Each page was in a sheet protector and when I printed the corresponding records, they would be slipped into the sheet protector along with the catalog page. This ensured I had all of the data I need to create a source citation later.
Now, the microfilm readers have thumb drives. I can copy and store the catalog materials in Evernote. I can take photographs of the pages (even microfilm projections) with my smartphone directly into Evernote. I can sit next to the film reader with my MacBook Air (tiny, lightweight) and take notes in a spreadsheet or on Evernote. There are a million different ways to do this. Use whatever works best for you and your process.
Before you leave on your trip, but once you’ve identified what repositories you’re visiting, get online and see what online resources they have. Google is excellent at this. Just search for their catalog. One small local library I often visit is the Wood County District Public Library in Bowling Green, Ohio. Their online catalog is very helpful, allowing researchers to know ahead of time what they have in their collection. Their catalog is connected to a larger database, so if they don’t have what you are looking for you can search surrounding area libraries and see if they have the item nearby. WCDPL also has an excellent collection of newspapers on microfilm which are what I usually access when I go.
While I’m in Bowling Green, there are a few other repositories and locations I like to visit:
Zoar Lutheran Church (though a large portion of their records have been moved to Way PL)
These towns are within about a 45 mile range from each other, stretching north/south on the I-75 corridor in NW Ohio. There are countless cemeteries and historical attractions in between. By accessing data online before I go, I can create a plan that makes the most of my time there. When you are planning a trip, widen your range and figure out what you can reasonably visit and research with your allotted amount of time.
Set your research goals, create a map, plan your time, make a “to do” list by accessing online catalogs, take notes in your research log about what you’ve found, and have fun!
A vital piece to a serious genealogist’s research, whether you travel far or stick to online and local sources, is a research log. There are several great templates online you can locate through Google searches. There are some available at Ancestry and Family Search. A research log helps you avoid duplicating work and can be a great assistant when it comes to write source citations.
There are several ways to create a research log. Here are a few ideas:
tables
spreadsheets
word processing document
paper forms – Although I try to be as paperless as possible, sometimes paper is your best option. I always enter the data eventually into my spreadsheet so that I can use “find” and “search” functions to locate specific items.
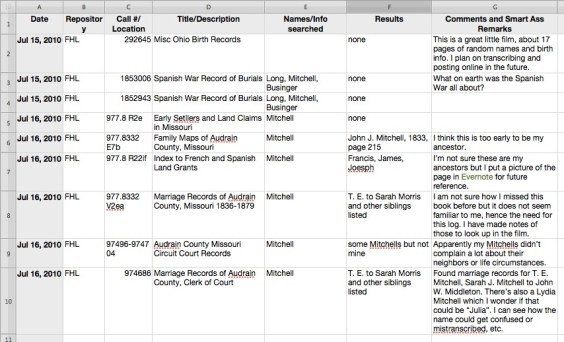
Within the document you might want to have several columns to keep track of the following (or create your own):
date
repository
who (specifically or the surname) you are hoping to find
record sets (call numbers or other identifiers to make it easy to locate)
an open column for making notes
a cell for recording the proper source citation (this can be used to later cut and paste into your articles, software, onto digital documents, and so forth, cutting down on some tedious work in the future)
Below is a terribly small example of what I’m describing:
You want to be sure to include enough information in this log to at least know where you’ve looked. This log is something you can add to every time you do more research, simply add a new date.
Your log can be as extensive or as simple as you want. If you use a spreadsheet, it can be as wide as you’d like, no paper size limitations! Spreadsheets also have the advantage of having “sheets” within the same document. [If you are using Excel, there are tabs for sheets at the bottom toward the left. If you are using Mac Pages, they are in the navigator on the left side of the screen.] You can have one document for each surname and then within, each sheet can be for a different repository where you’ve researched for that surname. Or you can create a system of your own. The important thing is that you create one, use it, add to it and check back before you do more research so you don’t duplicate what you’ve already done.
I mentioned before that I had ordered the same obituary 3 times. I have now put it in my research log, documenting that the lady (with the same name as my ancestor) is not mine. Giant bold letters now say “DO NOT ORDER THIS DOCUMENT AGAIN!!!” But the trick for me is to consult my log before I do it! I tend to think I’ll remember, but obviously, three obituaries later, I have some memory issues.
Once you have identified your research goals, you will need to make a plan to reach those goals. It is not enough to have a goal, a goal needs an action plan. This plan might consist of a list of steps, an inventory of sources, a map and itinerary of repositories to visit, and so forth. When planning a research trip, a research plan is vital to staying focused, being efficient and getting the most out of your time.
Your plan should cover these elements:
where you plan to visit
what records you plan to look at
what/who you expect to find in those records
brief biographical information on the ancestor to help you id the right person or other information such as a cemetery section to help you locate what you’re looking for
A plan can be expanded to also become your research log (see the next post for more details on the research log).
When traveling, I tend to drive if I have the time. I like being able to go to cemeteries, local libraries, history museums and courthouses that are on the way (or only slightly out of the way). I enjoy seeing the areas where my ancestors lived, walking on land they used to own, and seeing the documents they wrote with their own hands. You can’t really get a good idea of what our great country is like if you are in a plane 30,000 feet up. I do love a good road trip.
When planning your trip, use your genealogy software and locate target areas along the way. Seek out which cemeteries you could reasonably visit. Print out maps and directions to get you there. Planning ahead with a map is easy using tools like Google Maps. In 2011, I was on a very short trip visiting my relatives in Ohio. I planned a day’s tour through 4 cemeteries using Google Maps “My Places” feature. You can view the map here: Google Map of Cemetery Tour. Using this feature, I can locate the cemeteries, see the quickest route between them, make notes of the graves I am looking for – this was my research plan for that trip. [Tip: You can print these out in case there is a poor cell signal on your journey. There’s nothing worse than getting to a remote cemetery and not being able to access your research plan, trust me!]
The process of planning ahead can be fun, will give you the opportunity to be more efficient and will allow you to do some research you might have missed if you hadn’t planned ahead.
Establishing why you want to do anything is always a good first step whether it is genealogy-related or in some other aspect of life. You can’t know if you made it if you don’t know where you are going. There are many books, blogs, magazines, TV shows and so forth about defining and researching your goals and all of those can apply to genealogy too.
What do you want to accomplish? What is the question(s) you wish to answer? If you are like me you have many, many, many research goals. Some common goals might be similar to the following:
Who were my immigrant ancestors?
Where are all of my 2xgreat grandparents’ graves?
Where was the family farm of my 3xgreat grandfather in Wood County, Ohio?
etc…
A research trip might be just the thing to find the answers to these questions. Before you go, be sure you have clearly defined your goals for the trip. These goals can take on many forms. I will go over research plans in a future post, but generally I start with a word document and I create a table for each of my research questions. In this table I will list each repository I wish to visit and what documents or record sets I plan on exploring. An electronic document is great because you can add to it and change it to meet your needs. I can add notes right into the table regarding my findings. This later helps with analysis and correlation of my data as well.
Defining your goals and research plans will save you a lot of time when you arrive at your research destination. I have been known to spend at least the first day during a research trip using the repository catalogs. What a waste of time! Working in the catalog of a repository is something that can usually be done at home now, there’s no reason not to be prepared.
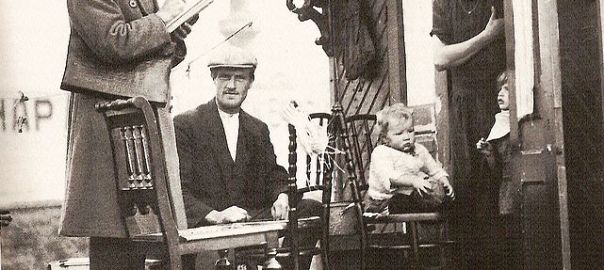
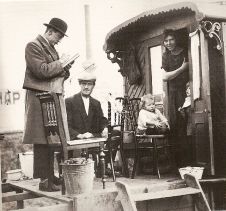 You might think that your ancestors were always home when the census taker knocked on the door. Or that they all sat down, had a cup of coffee or tea while they cooperated completely with the census taker’s questions. Honestly, we have no idea what happened. With the exception of the 1940 census, we have no idea who gave the information to the census taker. We don’t know if it was the head of household, his wife, one of the children, a neighbor, or if the census taker made it all up. We just don’t know.



 I have deep Germanic roots. My grandfather told stories of how his grandparents sat around the table and spoke in German. They were not the immigrants, in fact, I’ve traced back several generations beyond theirs and still haven’t found the immigrant ancestors! This tells me that they were proud of their heritage and carried their culture with them through many generations. Our country is made up of countless cultures all blending together and collectively adopting English as the primary language.
 One of my favorite record sets for creating a framework for any given family is the census. Census records can be an invaluable wealth of information putting ancestors in a time and a place every ten years (every five if you are lucky enough to have them in a state that held a state census every five). In the censuses from 1790-1840, only the names of the heads of households were recorded (and using those censuses can be a whole different animal). However, in 1850 we begin to get more information with every census. Heads of household, relationship to that head, birthplaces, birth month and year, occupations, whether naturalized, military service, and so on.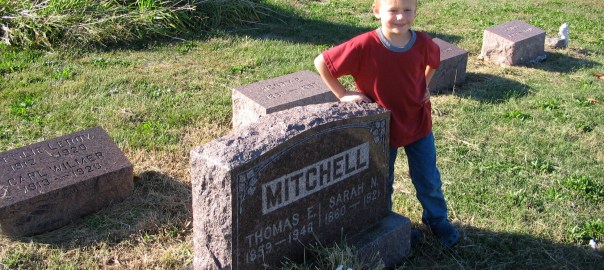


 Once you have identified your research goals, you will need to make a plan to reach those goals. It is not enough to have a goal, a goal needs an action plan. This plan might consist of a list of steps, an inventory of sources, a map and itinerary of repositories to visit, and so forth. When planning a research trip, a research plan is vital to staying focused, being efficient and getting the most out of your time.
 Establishing why you want to do anything is always a good first step whether it is genealogy-related or in some other aspect of life. You can’t know if you made it if you don’t know where you are going. There are many books, blogs, magazines, TV shows and so forth about defining and researching your goals and all of those can apply to genealogy too.
