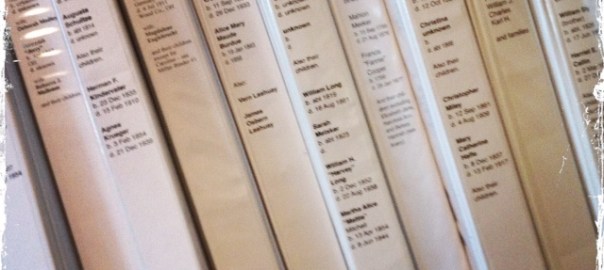
As I work through my work from when I was a “baby genealogist,” I’m doing a ton of clean up. I may have written about parts of this before, but I’m going to break down the steps I’m taking to bring my previous research up to the standards I have today. This might sound like a lot of busywork but it is actually quite fun, enlightening, and satisfying to revisit old research.
I have found several errors. Many just errors from not knowing what I was doing early on. Some errors involving attaching the wrong people to the tree or trusting those who researched before me to have analyzed the records fully. And I don’t mean for that to sound as harsh as it probably does. I just mean that none of us know what we are doing when we start out. And as a “baby genealogist,” I didn’t know to not blindly trust what others shared with me. They likely didn’t know any better either… and that’s just how it is, but that’s also how mistakes get made and perpetuated.
But I digress…
As I have been doing this work to clean up my old research, I have found myself following a series of steps. These steps may help you, they may be completely useless to you, but maybe you’ll find a nugget or develop your own series of steps. I am working to mirror my physical binders and my digital folders. Personally, I think this is a good way of ensuring that my research may be preserved. If the binders are well organized and understandable, then my kids are more likely to look at them. I’m not certain my digital items on my laptop, or my genealogical software might make it. My Ancestry tree may. Be sure to set up a “Legacy Contact” person who can take over after your unfortunate demise. (Sorry, did that sound too ominous?) This can be found in your Account Settings.
My current steps, usually in this order, but not necessarily:
- Choose a binder.
- The main section should be the couple of that generation. The back is divided for sections for each child (except the one I descend through, they have their own binder). (More on this can be found in a previous blog series.) Make sure there are tabs that label each child’s section.
- Open my Reunion file. Reunion (and other programs probably) gives each source a unique number. I use this number to label my paper files. This allows me to look sources up by number, but also tells me that that physical source has been entered in my Reunion file. I just write that number on a little sticker (like a garage sale price tag type of sticker) and put it on the upper right corner of the printed document.
- I have been writing citations for a long time for each of my documents. However, as my understanding of sources and as the genealogical industry grows and evolves, so do my citation styles. So, I next look at the previous citation and update it if necessary. My system for storing the citations has changed over time as well. I do what I call “Touch it Once Citations” where I only write a citation once and then it’s just copy/paste for any articles or blog posts I write that require a citation. I have now added a column to store that Reunion source number. Adding this number tells me that I’ve updated the citation to today’s standards and have added it to Reunion.
- Once all of the existing documents have been checked, sources updated and logged, I then start picking up any “low-hanging fruit” for the couple and their children. Things like census records I hadn’t gathered yet (in many cases the 1940 and 1950 census weren’t around when I was working on some of these), newspapers and vital records that are now available online. Anything easy that wasn’t easy when I started. And mostly I’m just getting the basics on the children that are not my direct line.
- For these new sources, downloading them to my computer, writing the citations, entering them in Reunion, adding them to my Ancestry tree, printing them and putting them in the correct location in the binder. I am also labeling the digital files in a way that mirrors my binder system. (Again visit my binder series for details.) I’m adding the source number to the page and putting them in the binder.
Those are the main steps I’m taking right now. I manage to work on this a couple of hours per week around my other life responsibilities.
Once I’m caught up on all of this clean-up I have other steps I plan to take such as:
- Transcribing documents. Kids these days (‘get off my lawn!’) can’t read cursive… many adults can’t read old or messy cursive.
- Writing up short biographical sketches that put into narrative form the documents in the binders, a TLDR if you will.
- Clearing out any old photo copies of indexes, pedigree charts shared with me from other researchers, copies I made from books when I wasn’t sure if it were my family or not, etc. My binders have collected a lot of “chaff” over the years. I need to go through it and clear those out if possible.
- Updating pedigree charts and family group sheets that I put on the front and back of the binders as kind of a road map to what’s inside.
I hope that gives you some insight into how I’m doing my “baby genealogy” clean-up. And I hope it gives you some ideas on how to handle yours if you’re so inclined. You may decide that you don’t want paper binders. That’s ok. You do you! It’s less stuff to go in the dumpster when the kids take over, that’s for sure. I’m hoping the physical papers will spark interest in my kids. Time will tell.


Thanks for sharing your system Cari! I’m starting the process of revisiting my “baby genealogist” work and have already found a couple of clues, for my ancestor, that got missed.