Before you start building your locality guide, you may want to make a few decisions. Primarily you will want to decide what format you want your guide to be in. Do you want to use a spreadsheet, word processor, or note-taking software such as Evernote? Do you want to use paper and pencil/pen? Where do you want to store it? On the cloud, in your desk, on your laptop? These are decisions you will have to make and they will depend on how you work and think and organize your resources.
I have traditionally organized my locality guides in a word processing document creating my own “quick sheet” for that location. However, I have begun moving them into Evernote (a note-taking software system that can sync between your devices) so that I can access them anywhere if need be. I prefer an electronic system over a paper system because:
You can add clickable links directly to databases, e-books, websites, etc.
You can use the “find” and “search” features for locating keywords in your guide.
You can add information, copy/paste, and insert graphics quite easily.
You can save it to the cloud and access it anywhere with your phone, laptop, or tablet.
If you prefer paper and pencil, I’m not one to judge. I still love reading things on paper. If I were to make a locality guide entirely on paper, I would use index cards whereby each card is its own entry. This will allow you to sort and organize your index cards in any order you like, and add new information to the set as it is found.
If you decide to use a word processor for your guide, you may consider saving it to the cloud either through a service such as DropBox or by compiling it directly in a service such as GoogleDocs. Both of these will allow you to access your guide anywhere.
Next we will discuss what to start putting IN your guide…
I like to write in “bits.” By ‘bits’ I mean short thoughts, a couple of paragraphs on one idea, or a page at a time. My ‘bits’ can be found everywhere: notebooks, margins, on my phone in the notes app, in emails or texts to myself, slips of paper on my desk, sticky notes sticking to all kinds of things, in Evernote, and in other places. This is not very organized! Unfortunately, many writers that I’ve talked to are like this. When an idea hits you, you have to take a moment to write it down wherever you can.
How do you manage all of those ‘bits’? Here are some ideas I’ve developed over the years:
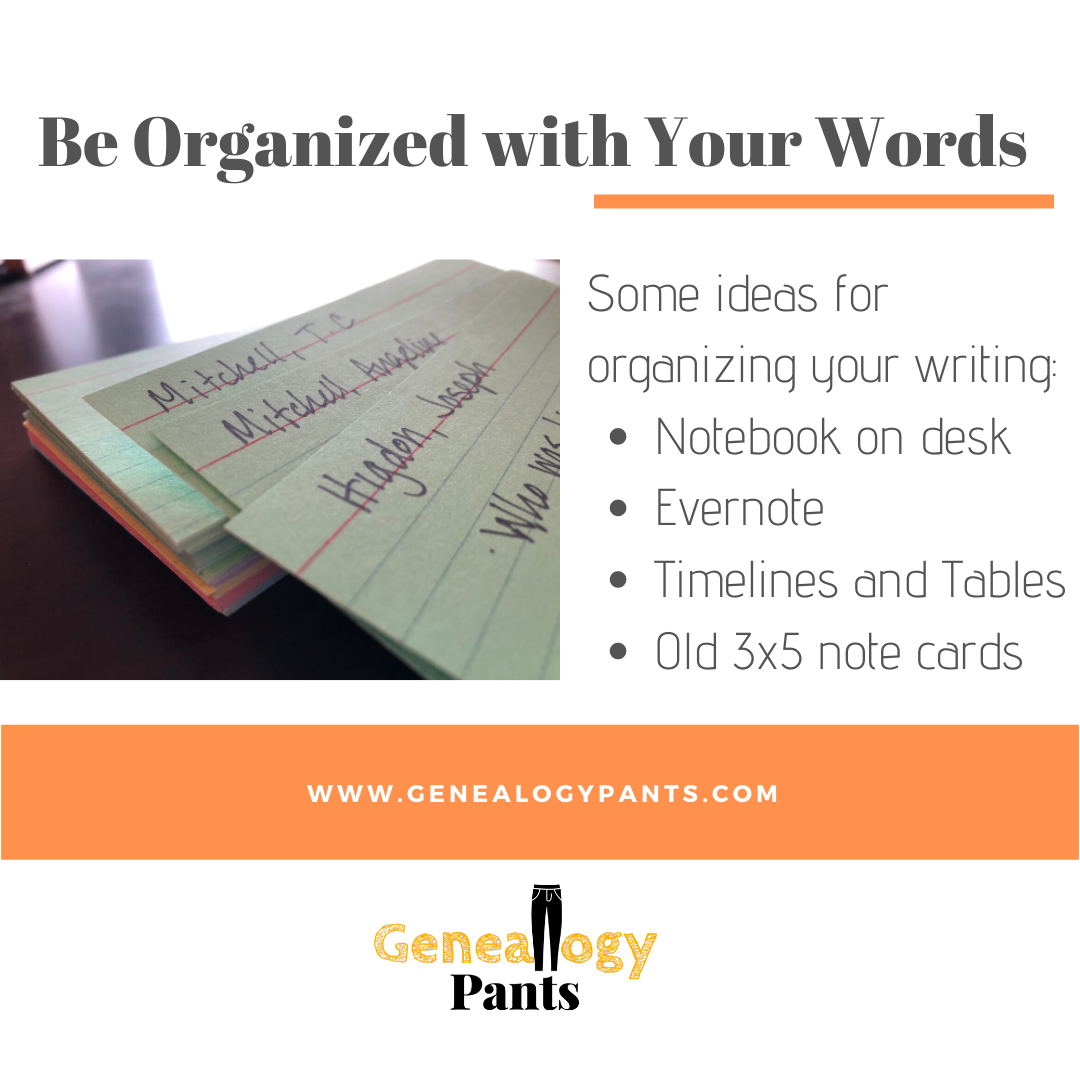
Keep a notebook on your desk. I have a notebook that I use as a holder for my writing ideas of whatever kind. I prefer paper most of the time. I find it easier to jot my ideas down rather than finding my phone, opening an app, being clutzy with the typing and dealing with autocorrect, and so on.
Evernote. I already use it a lot for research notes. This one is easy for the mobile aspect of note-keeping. I may not always have my notebook, but I’m rarely without my phone. Now, instead of texting myself or emailing myself or using the notes app, I try to put thoughts into my Evernote app in a folder called “writing ideas” if it is a general idea, or in a particular folder if it has something to do with something I’m already working on. And if you aren’t an Evernote user, use your software/app of choice.
Use timelines and tables. When working on certain research projects, especially trying to determine if I’m working with one man or two (or more), timelines and tables can be helpful in organizing the evidence I’ve found and then make a reasonable determination.
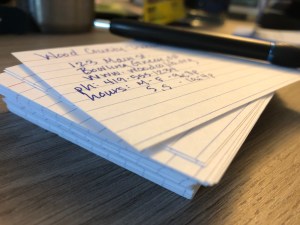
Use note cards. Yep. I said it. Use that old-school item, the 3×5 notecard. I use them when I’m working on how to organize my evidence items. They help me decide when to introduce a new evidence item, concept, or individual when working on a larger writing project such as a case study.
When you accumulate a lot of ‘bits’ you need to do something with them to keep them organized. Some of the above might work for you, or you may find another system that speaks to your way of doing things. However you do it, your system should help you keep your ‘bits’ in a logical order, contained (to avoid tangents), and on topic or theme.
I find that over time, that I can take those ‘bits’ and put them into a larger writing piece. And nothing is better than getting a larger writing piece put together!
I am heading off to Georgia to attend the Institute of Genealogical and Historical Research (IGHR). I am excited to finally take the writing course from Tom Jones, “Course 4: Writing and Publishing for Genealogists.” This has been on my educational “to do list” for years and I’m finally getting to it!
These days, we are saying good-bye to paper more and more. Don’t get me wrong, I LOVE PAPER. Ask any of my students, discussion group attendees, family, or friends. I still print all of my research documents and organize them into binders. I also like taking handwritten notes. However, those institute binders really add up and for many of us, space is at a premium. Plus, it keeps the costs down if an institute doesn’t have to pay to print and organize all of those syllabi. Of course, you can still usually buy a printed syllabus or print it on your own. And if you do, do not worry! I’m not here to be down on anyone’s system. However, in order to use less paper, and utilize the electronic syllabi more effectively, I have come up with a system that works for me. Maybe you’ll find something in here that can work for you too.
Before I go to any institute, there is an amount of prep-work I do with the digital syllabus so I’m organized and ready to take notes. I utilize a combination of a PDF-splitter and Evernote. What I mean by a “PDF-splitter” is using a bit of software to make one large PDF into several small PDFs. I believe the full version of Adobe Acrobat will do this (but I don’t use it so do some research first), as will several other programs. I use a Mac and have found “PDF Toolkit+” to meet all of my needs. It has a lot of features, but today I’m focusing on the “split/extract pages” portion of the software.
Screenshot of PDF Toolkit+ with a range of pages to be extracted.
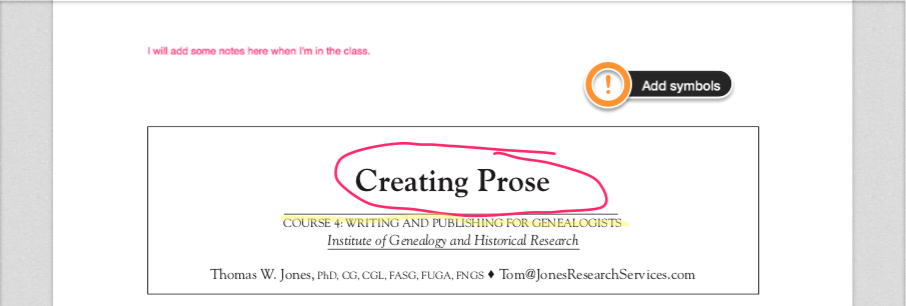
Basically, I sit down with the class schedule, the large PDF, the PDF-splitter, and Evernote. Using the splitter, I extract the pages for each class and then create their own note in Evernote, dropping in just that portion of the PDF. This allows me to have each the syllabus material for each class split out into one small file. Then I can type my notes into each note or take handwritten notes on paper to scan/type in later (they say the brain retains information better when you take notes by hand). Evernote also has tools that allow you to highlight, add symbols, draw, or take notes directly on the PDF.
Just an example of some of the ways you can mark up the PDF using Evernote’s tools.
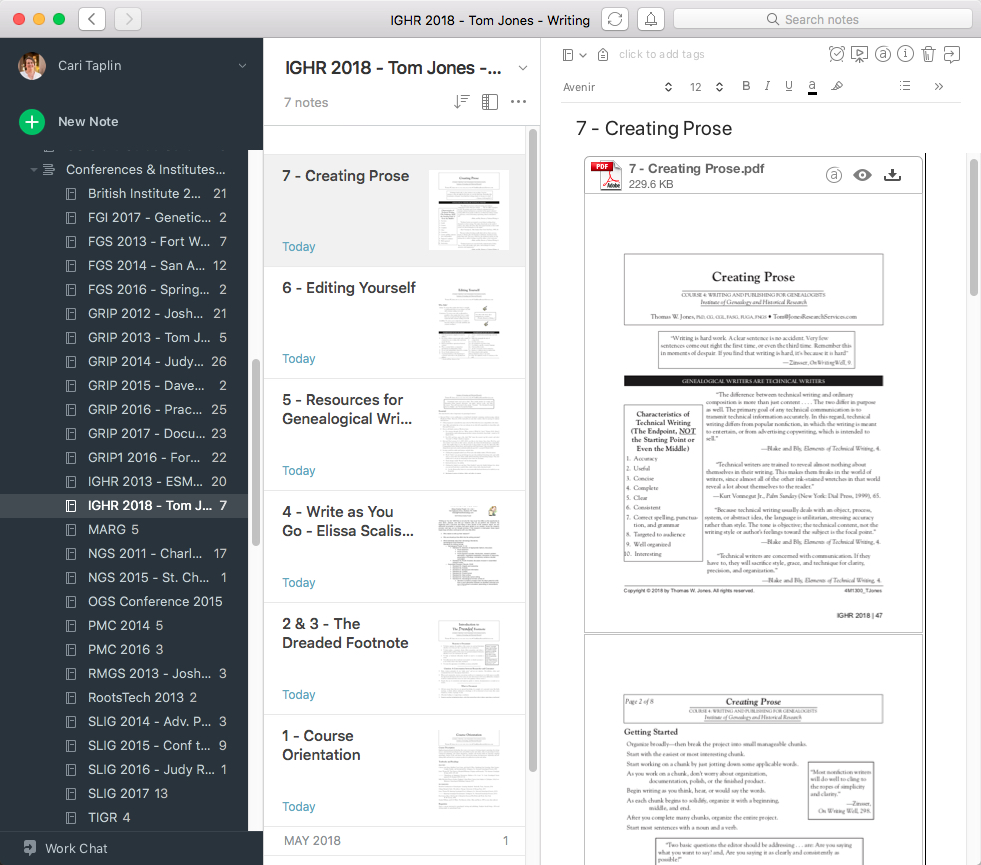
I organize these notes into a new Evernote notebook titled appropriately for the institute I’m attending. You can organize them in whatever way works best for you. I number them according to the order they should be taught based on the class schedule. See my example below.
On the left is the list of notebooks from all institutes I’ve ever attended (and added to Evernote), IGHR 2018 is highlighted. In the middle are the thumbnails of each individual note in the highlighted notebook, numbered according to class order. On the right is the full view of the note with the PDF dropped in.
As the week moves on, I open the note for the appropriate class, and either use the syllabus visually and then take handwritten notes or I type my notes above the PDF. I take handwritten notes most of the time for the reasons already mentioned) but I do also use the mark-up tools available as well, especially if I don’t want to forget something in particular mentioned in the syllabus. Often, it just depends on how I feel when I get up in the morning. Evernote notes are word searchable, and there is a tagging system to help you be organized as well.
The most important thing is that you find a system that works for you. If digitized notes and syllabi are not for you, I hear you! It really has taken me a long time to get to this point…and I’m not completely digital myself and probably never will be. But, to save on costs and space, this is one of my systems for eliminating paper.
 I like to write in “bits.” By ‘bits’ I mean short thoughts, a couple of paragraphs on one idea, or a page at a time. My ‘bits’ can be found everywhere: notebooks, margins, on my phone in the notes app, in emails or texts to myself, slips of paper on my desk, sticky notes sticking to all kinds of things, in Evernote, and in other places. This is not very organized! Unfortunately, many writers that I’ve talked to are like this. When an idea hits you, you have to take a moment to write it down wherever you can.